6 DYI RV Exterior Upgrades Without Breaking Bank
Your RV’s exterior should be as pleasant as the interior. There’s no reason the exterior should look worn, dull, and faded.
Having a beaten-up RV exterior isn’t only a thorn in the eyes, but it also drags down the value of your camper.
Fortunately, in this guide, I’ll share some handy RV exterior renovations you should consider.
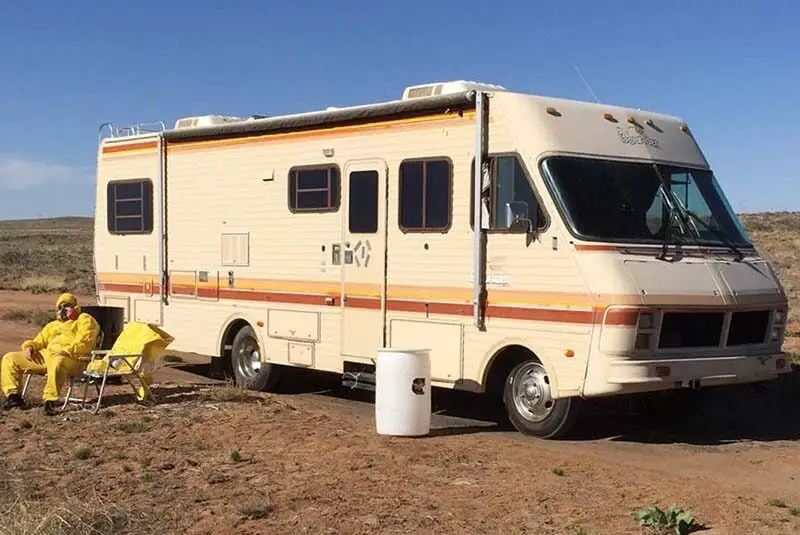
Get Rid of the Breaking Bad Look
It seems like the default exterior for most RVs today is white/brown/black, with wispy lines going down the sides. I guess manufacturers use generic paint schemes, graphics, and neutral tones for mass appeal.
However, there’re much more appealing options to spruce up your RV’s exterior.
Enter, wrap and paint job.
I’m against wraps because they are usually not high quality and hardly last as long as a good-quality paint job.
Installing a nice wrap can also be expensive. The price estimate of a generic wrap decal package is north of $2,000 for a mid-sized trailer.
Painting works best and is a great way to make your RV more appealing. The key to any good paint job is prep (masking, sanding, and fixing problem areas).
You must also go with proper automotive paint and high-quality clearcoat if you want your paint to last.
Now, I’ve seen a handful of DIY RV paint jobs, and honestly, the results are horrific. Painting an RV, however, isn’t that difficult, but it needs some practice.
Here’s a simple step-to-step RV painting guide:
- Clean the RV exterior with tsp to remove dirt, oxidized paint, and other mess
- Lightly sand the surface. Rough up the surface so that the new paint adheres well. Don’t overdo it; there’s no need to go bare metal.
- Look for imperfections and fix them.
- Add a layer of metal primer. Use a foam brush or spray can. Use a professional spray can kit for professional results.
- Add your preferred metal paint.
For most DIY projects, the RV painting job is a balance of how much time, effort, and resources you want to dedicate to the painting project.
Using a good primer is key. It takes more time and effort, but it ensures a longer-lasting job. It keeps your paint free of scratches, fades, cracks, flaking, and nicks even after several years.
Use one primer and two layers of paint. This way, the second top will pick up any misses, and the sheen will be more uniform.
Sherwin Williams pro-block oil-based primer is perfect. Benjamin Moore also has some nice primer products. However, if you find them expensive, you could go with any other primer, but at the very least, it should be an extreme bond primer.
One thing you should avoid completely is using the regular old primer. It won’t last.
RV Exterior Lighting
There’s something inviting about lighting your RV exterior.
I recommend that whatever exterior lighting option you choose, ensure it has at least three different lighting levels. Bright light, medium light, and night light.
You could also toy around with the multi-color LED strips. They’re also pretty bright.
Solar-powered LED strings are cheaper, but most tend to be very dim. They don’t provide illumination and are only perfect for decoration.
You must adhere to proper lighting etiquette for whichever exterior RV lighting you install. I treat my outdoor RV lighting not any different than noise.
I try to minimize the lighting around me as much as possible and not to be a bother. I also usually pay attention to what others are doing around me. For example, if everyone in the camp is bright, get for bright. If everyone is keeping it dark, only turn it to dim.
Proper lighting etiquette is also turning off your lights when you retire for the night. Sadly, most RVers don’t do this.
It’s best to check your surroundings and think about your neighbors. I don’t like it when lights go through my tent while sleeping.
Outdoor Mats/Rugs
The warmth and function of an outdoor RV rug are awesome. And Walmart has a full aisle of rugs in the RV section for 40 bucks.
Adding a rug to your RV certainly helps to keep the dust down and keeps the dirt from being tracked into the trailer.
[amazon link=”B07KP63BQY” link_icon=”amazon” /]
And depending on the color scheme, an RV rug could also extend your living space to the outdoors. Rugs with fluffy and soft fabrics also create the perfect space for stretching and exercising. My dogs use my RV rug to lay outside all day long.
[amazon link=”B0083LIKU0″ link_icon=”amazon” /]
I strongly recommend the woven vinyl mats, especially if you want durability. These mats hardly soak up the water when it rains.
Plus, they can withstand the open-air components and survive extended periods in the sun and inclement weather without wearing out.
When it comes to RV rug maintenance, one thing that I’ve found that kills the rugs more than anything is the folding and rolling. It’s important to have a bag that will allow you to roll the rug full width without folding.
Add a Bumper Grill
Adding an RV bumper grill creates the perfect outdoor cooking space without taking up much of your storage space.
The RV bumper mounting brackets lets you securely store and use an RV grill anywhere and anytime. It eliminates all your outdoor space concerns.
[amazon link=”B08HWYLYX9″ link_icon=”amazon” /]
It’s also much safer because the arm lets you cook away from your rig and keep all the heat and cooking smells outside.
[amazon link=”B09H3NGVLM” link_icon=”amazon” /]
RV Clothes Drying Rack
The RV drying rack is also another pleasant addition to your RVs exterior, especially if you love boondocking.
[amazon link=”B07CV6P1K7″ link_icon=”amazon” /]
With no washing machines and dryers in sight, a drying rack will make the drying process less hassle.
The rack is also great for hanging your beach towel and swimsuit instead of bringing your clothes to the shower.
[amazon link=”B095CT7BFG” link_icon=”amazon” /]
We’ve two for our motorhome, and we use them to hang everything from kitchen towels, clothes, and bed liners to dry herbs.
Avoid plastic or wood dryer racks. Neither lasts. Instead, choose stainless steel or a coated metal rack.
There’re also different RV dryer rack designs, and in my opinion, how many clothes and how you want to hang your clothes dictate the style of the rack.
For example, do you want to lay your jean directly over a single bar or two bars for more aeration or use hangers?
IKEA has some really good RV dryer racks. You could also check Amazon for additional ideas.
Outdoor Or Garage Storage
RV drawer slides should save you from the hassle o crawling inside the basement of your RV storage.
The drawers are practical, and if you’re worried about the weight, don’t. Some of these slides can hold up to 500 pounds or more.