4 Tips and Strategies for your RV Floor Renovation
Renovating an RV usually starts from the ground up. A new floor can make a huge difference in your RV’s interior.
From experience, renovating your RV’s floor is fairly simple, provided the subfloor is intact and has no mold or mildew issues.
In the guide below, I’ll go into the details of renovating your floor.
Signs you Should Renovate your RV Floor
For most RV users, RV floor. Updating your floor can give your RV a new and exciting look.
There’re, however, other reasons why you may consider renovating your RV floor.
Old age is a common reason. Most carpets, for example, rarely exceed eight years, and if you bought an old motorhome, you might find the need to cover for the wear and tear.
Renovating the old floor may make sense if the previous owner also had a pet and smoked inside their RV.
Finally, renovating your RV floor may help to curb water damage, mildew, and creaks.
Installing New Flooring can be difficult but it doesn’t have to be!
Here are some Great choices for your RV Floor Renovation
More Great choices for your RV Floor Renovation
Steps of Renovating an RV Floor
1) Tearing Down the Original Flooring
The first step of RV floor renovation is removing the existing floor. Go around and throughout the rig and remove all the trim and baseboards.
Next, start tearing up the floor. The complexity of tearing down the existing floor will depend on the type of old floor.
For example, a carpet floor isn’t challenging to tear, but you’ll have to spend a huge chunk of your time removing the hundreds of staples used to bind the carpet to the subfloor.
2) Assess the sub-floor
Once the existing floor is all torn, you need to assess the subfloor.
Sometimes, you may find areas with water damage, leaks, and mold. In most cases, the damage is usually superficial, and the wood is not rotted.
You don’t need to worry much about a replacement in such cases. Instead, I recommend you turn down your AC and put some large damper containers in the rig to help absorb the moisture.
Damprid is a nice solution if you can’t afford a dehumidifier and the electricity to run it. Get a couple of buckets if the water issue is large-scale.
It works well for small moisture issues, but don’t expect miracles. However, it’ll clear all the musty smells, keep the floor dry and eliminate the gross, damp environment.
Next, you need to hold your renovation for a while and let the RV sit for a week to let everything dry out. Good for you if everything dries out well and the wood feels solid.
However, if the water issue is widespread and the wood is already rotted, there’s not much Damprid can do.
So, identify the extent of the rotten and “soft” spots in the plywood subfloor. Next, cut the damaged and rotten section before replacing the floor with new plywood.
To avoid any future concerns about mold, water infiltration, and water damage, you must coat the entire subfloor of the RV with a mold-killing primer.
After the mold treatment dries, you can apply a coat of wood hardener. PC wood petrified is a nice example.
The wood hardeners form an epoxy-like coating when it dries and hardens the wood. It won’t turn wood into steel or anything, but it makes the wood less susceptible to water damage. It’s the perfect insurance against further damage.
Installing New Flooring can be difficult but it doesn’t have to be!
Here are some Great choices for your RV Floor Renovation
More Great choices for your RV Floor Renovation
3) Best Replacement Floor for RV
Step three of the RV floor renovation is selecting a floor to use. There’re lots of flooring options to choose from.
However, if you’re still unsure of what flooring option to go with, here’re a few pointers to help you with the selection:
Durability: If longevity is your primary concern, pick a floor that can stand up to the vigor of van life. Consider how well it’ll react to abuse from elements and use.
Weight: It’s important to keep the weight down in all your van build decisions. Some flooring options are lighter than others.
Comfort: How does a particular RV floor feel under your feet? Is it warm, cozy, or cool to the touch? Does the floor offer slip resistance?
Price: There’re some inexpensive yet awesome RV flooring options out there. No need to break the band when selecting an RV floor!
Appearance: Finally, consider your style. Rustic? Modern? Warm or cool tones?
Considering all the above factors will make your floor selection decision much easier and simpler.
My tip regarding the RV floor purchases is you should start by checking your local community marketplaces, such as Craigslist or FB marketplace.
The square footage of the material needed to cover your motorhome isn’t that much, and sometimes it may match up with the overage of someone’s project!
And you can be sure he’ll give it to you at a nice price. You might also get inspired by their completed project.
Some of the popular RV flooring options include:
Wood: Pros: It has a nice residential feel. Cons: Bulky. Prone to element damage.
Cork: Pros: Sustainable, soft, and comfortable Cons: Expensive
Sheet vinyl: Pros: Inexpensive, creates water & infiltration barrier Cons: Cracks at sub-zero temperatures
Rubber flooring: Pros: Durable, non-slip, sound-deadening properties Cons: Heavy, has a smell
Marmoleum / Linoleum: Pros: water & stain resistant, made from renewable materials Cons: Scratches and dents easily, discolors
My personal favorite RV floor material is vinyl. It lays in place with no snap lock. Plus, you can always replace a damaged piece with a plunger.
Vinyl flooring also looks much better. But more importantly, it’s lighter per plank, and each new plank is bigger, requiring fewer planks and no underlayment. It’ll shave you several pounds and man-hours to install the vinyl floor.
Installing New Flooring can be difficult but it doesn’t have to be!
Here are some Great choices for your RV Floor Renovation
More Great choices for your RV Floor Renovation
4) Installing Vinyl Floor on your RV
Here’re the steps for installing the vinyl floor on your RV floor:
- The first step of the actual vinyl floor installation starts with prepping the subfloor, which we discussed much earlier.
But as a recap, ensure all staples are removed or hammered in, all water damage is addressed, and the uneven seams are sanded.
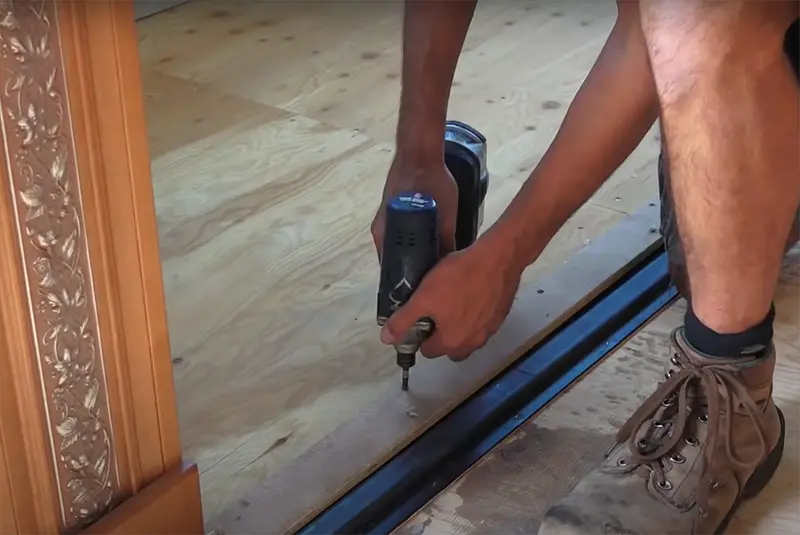
- Step two of the new floor renovation is applying glue to secure the vinyl planks. I’d recommend starting with a slide-out in the left corner of your motorhome.
A notched trowel will come in handy when applying the adhesive. Ensure it’s on a 45-degree angle.
- Lay your first plank of vinyl floor, and maintain a ¼” gap between wall and floor to allow expansion.
- Lay the consecutive plank. Start by placing the left corner first ad adheres to the plank.
- Use a roller to ensure proper plank adherence
- Repeat until the entire RV floor is covered
Installation Mistakes to Avoid
Many DIYers make the mistake of thinking their vinyl sheet should be one solid piece, laminated throughout.
It not only makes cutting the angles correct, but it doesn’t cater to the expansion and contraction, which may cause the floor to wrinkle.
Therefore, installing the planks individually in each room and with a seam at each entryway is important.
RV Floor Renovation Tips
Here’re a few tips you must follow to get the RV renovation job done efficiently and affordably as possible:
- Before replacing the floor, you must always double-check the subfloor for any damages, especially water damage and mold.
- When mixing the mold deterrents, ensures you take the proper precautions. Have a mask and glove at the bare minimum.
- Always exercise caution with tools. Some are potentially dangerous, especially if used haphazardly.
- If in doubt, you can always consider hiring a professional
How Much Does It Cost to Renovate an RV Floor?
In a previous post, we discussed the cost of renovating an RV floor.
But generally, the cost will vary. Numerous factors determine the final cost, including the type of material and square footage.
Regarding the materials, tile and hardwood are at the top of the scale, whereas carpet ad linoleum is some of the cheaper and simple flooring options.
Nevertheless, depending on the size RV you have, expect to pay between $500 to $5,000 for the RV floor renovation.
Installing New Flooring can be difficult but it doesn’t have to be!
Here are some Great choices for your RV Floor Renovation
More Great choices for your RV Floor Renovation