Tips and Best Products for Your RV Roof Renovation
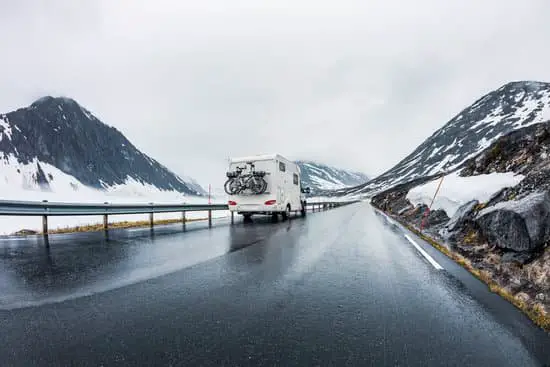
Your RV roof is usually the most exposed section to elements. From the scorching sun and snow, beating from the rain and hail, falling objects and wind, there’s so much that can cause damage to your RV roof.
And therefore, if your RV has been outside for a while, the roof will almost always need repairing and, in extreme cases, a replacement.
Remember, like your home roof, the RV roof protects you, your family, and your belongings, so there’s no need to skimp on renovation.
If you miss a crack and the roof is left leaking, your RV can become a complete write-off in as short as a year or two, depending on the climate.
In my opinion, it’s much cheaper to avoid water intrusion or any other RV roof damage in a couple of hours and under $50 in sealants than to replace the entire roof.
Of course, the project may feel overwhelming if it’s your first RV roof repair. But far from it.
Self-repairing is the way to go. Roofs are easy enough to fix and aren’t technical at all.
Look, I’m not handy, and I suck at most DIY projects, but I’ve never hired a professional for my RV roof repair. Knowing how dealers work, I’d bet there’s little skill involved.
Consider the Type of RV Roof
The first step of renovating your RV roof is determining the type of roof. Knowing your RV roof type will dictate the maintenance and repair process.
For the most part, RV roofs fall into two categories:
- Thermal Poly Olefin (TPO)
- Ethylene Propylene Diene Monomer (EPDM)
Both materials are synthetic roofs, mainly made out of rubber. Distinguishing between the two can be a challenge sometimes.
Now, you may have heard different techniques for determining the type of roof, but I’ll demonstrate a surefire way to ensure no questions are left unanswered.
One of my favorite methods to determine the type of RV roof is to locate the overhead air vent. And then, using an appropriate screwdriver, I remove the vent ring.
The thing is, most manufacturers usually place a sample RV material roof on the sides of the vent.
Inspect the material, paying attention to the choice of color and pigmentation. TPO material is usually a single white/Dover color on all sides. In contrast, EPDM material has a white color on one side and a black color on the other.
The choice of material determines what sealant to use. Dicor lap sealant is generally accepted as the go-to sealant for both materials.
Dicor RV Roof Renovation Products
RV Roof Renovation Products
However, if the TPO material has a smooth backing (not fleece), I would suggest using a Dicor Ultra Sealant.
You should be specific with the sealant you use on your RV roof because there’s so much misinformation getting peddled around.
For example, most authors will say using silicone caulking is enough, but it’s far from it. For example, EPDM and TPO will react to abrasive and citric-based cleaners. EPDM rubbers are also affected by oil and petroleum products.
Of course, EPDM and TPO aren’t the only materials used for RV roofs. Over the years, manufacturers have used other materials, including aluminum, fiberglass, and galvanized metal.
It’s a good time to repair or replace RV Fresh Air Vents
The trick to knowing what material your RV uses and the maintenance tips to follow is to check the user manual.
RV Roof Inspection
Water damage is usually at the top of my list regarding roof maintenance.
There’re several reasons for this. Remember, whenever the manufacturer cuts a hole in the roof, there’s a potential leak. Secondly, there’s a chance of a leak everywhere the sidewall and end caps meet.
Then when you add all the twisting and flexing on the road, you’ll realize it’s only a matter of time before your roof gives in.
But the good thing is a few preventative measures, such as periodic roof inspection, can help avoid costly damage and water intrusion.
Of course, the sealant will do a good job, but it can only last for so long. With time, they start drying out, crack and let the water seep in.
The manufacturers are usually aware of these issues, and this is why they recommend roof inspection routine inspection.
An RV roof inspection will reveal the cracks, damages, and any other issues before they translate into expensive repair bills.
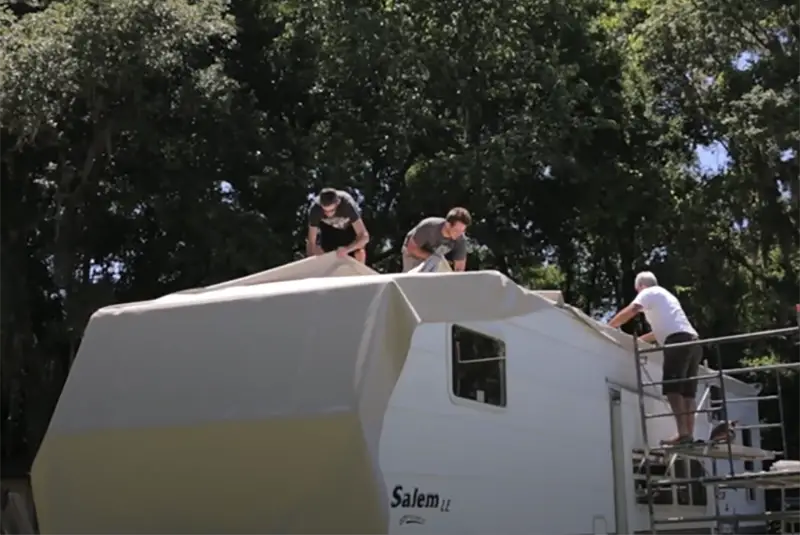
You must climb up and fully inspect the roof at the absolute minimum. There’re safety concerns anytime you work on the roof.
Dicor RV Roof Renovation Products
RV Roof Renovation Products
For starters, ensure the roof can support your weight. Most roofs are plywood, with a rubber membrane over them. If the rubber is rotted and leaking, it may give in and result in a fall.
Other RV roofs aren’t designed to be walked on.
Simply put, always exercise caution when working on the RV roof.
Once on top, perform a thorough inspection of the edge and seams. Check signs of wear, tear, holes, or any other damage to the roof.
Applying Sealant
A major part of maintaining your RV roof is sealant application. During the inspection, you should look for cracks where the sealant has worn out.
Before sealant application, it’s important to clean the damaged surface and surrounding surfaces. You could use water, but a Dicor roof cleaner is more appropriate.
It eliminates all the dust, dirt, and anything that may prevent your sealant from adhering.
My favorite sealant is the Dicor self-leveling sealant. It’s perfect for roof-level surfaces such as RV rents and roof caps.
Dicor is compatible with EPDM and most TPO roofs. On top of that, it adheres firmly to other materials such as aluminum, vinyl, galvanized metal, and fiberglass.
To touch up or reseal on uneven or raised RV roof surfaces such as TV antennae or skylights, use Dicor non-sag lap sealant.
A caulking gun comes in handy when applying the sealant.
What About Eternabond Tape?
Eternabond or butyl rubber tapes work, but they’re not as efficient sealants as Dicor.
From experience, the tapes are only good for large flat seams.
Plus, using tape as a sealant requires a substantial amount of pre-work. It is important to clean the surface for better tape adherence.
Dicor RV Roof Renovation Products
RV Roof Renovation Products
A couple of spots may spell trouble for the tape sealant due to their shape. For example, a tape sealant isn’t effective at maintaining a sealant for extended periods on curved surfaces.
Where the tape does work is on the long straight seams on the top, provided you clean it well first.
What About Silicone?
I would only suggest silicone as a sealant if you want you or your future owner to curse you for eternity. Nothing sticks to old silicone, and cleaning it off fully is a nightmare.
In short, silicone makes the resealing job a painful event.
Roof leaks and damages are more common than you would think. I hear RVers say, “they don’t build them like they used to,” but it has always been this way.
Staying at the top of your RV roof repair inspection and maintenance is crucial if you want your RV to last.
Covered storage may also help to extend the life of your RV roof.